In a nutshell
- 🔧 Why walnuts work: natural walnut oil seeps into abraded fibres and micro-particles feather edges, creating optical blending that hides light scratches without sanding.
- 🧭 Step-by-step fix: clean the area, warm the kernel, rub in circles then with the grain, pause, and buff—remember, less is more; optional beeswax can unify sheen.
- 🧪 Use cases and limits: ideal for cosmetic correction on surface scuffs; poor on deep scratches or raw wood; test on light finishes and switch to wax sticks or markers if blending fails.
- 🧹 Ongoing care: protect with felt pads, use pH-neutral cleaners, avoid steam; revitalise with maintenance oil or screening/recoat, and note nut allergies as a hard stop.
- ⏱️ Practical payoff: a fast, low-cost touch-up that softens marks in seconds and buys time before larger repairs—keep a few kernels ready with your cloths.
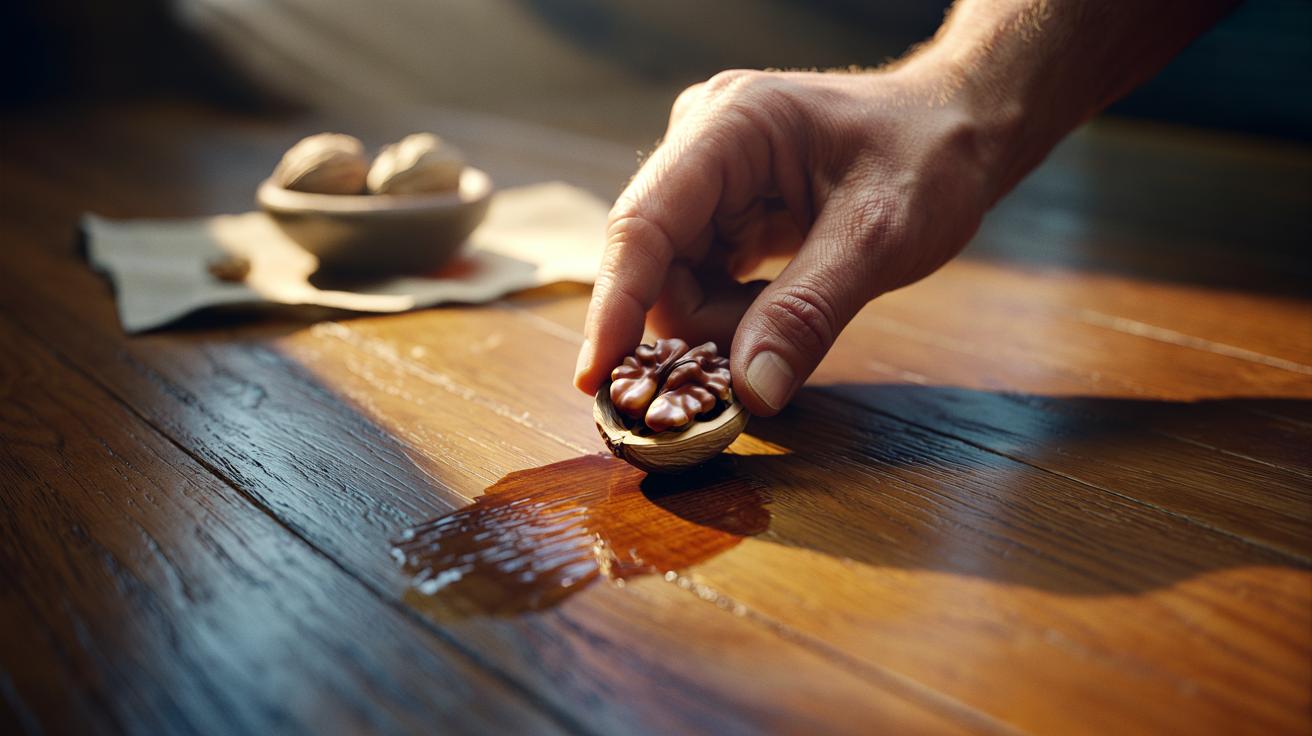
There’s a household secret hiding in your snack bowl. A simple walnut can blur scuffs and disguise light scratches on timber in seconds, restoring confidence as much as sheen. The trick isn’t magic; it’s chemistry meeting craft. Rubbed into a mark, natural walnut oil darkens the exposed fibres and fills minor abrasions, making damage far less visible without sanding or varnish. It’s fast. It’s quiet. It costs pennies. Used correctly, a walnut can make a tired plank look freshly polished while you wait for the kettle to boil. Here’s how it works, when to trust it, and what to do when scratches run deeper.
Why Walnuts Work on Wood
Walnuts carry a cocktail of drying oils, pigments, and soft particulates that behave like a tiny, self-contained touch-up kit. When you rub a kernel over a light scratch, warmth from your hand liquefies the oil. It seeps into the porous, abraded fibres, subtly darkening the pale line where the finish was disturbed. Simultaneously, the nut’s micro-fragments act as an ultra-fine abrasive, feathering the edges so light reflects more evenly. Result: the scratch visually retreats. It’s optical blending, not structural repair.
The method shines on surface-level scuffs in oiled and waxed finishes, as well as many polyurethane-coated floors where only the topcoat is grazed. Because walnut oil is a drying oil, it polymerises slightly, helping it stay put after buffing. That said, it won’t fill gouges, rebuild missing finish, or beat deep pet claw ruts. Think camouflage, not carpentry. Allergies matter too: if nut sensitivities are present at home, use a commercial scratch concealer stick instead.
Remember, the floor’s species and stain affect results. Medium and dark timbers—oak, walnut, acacia—often blend beautifully; pale maples may need a gentler touch and follow-up buffing to avoid over-darkening.
Step-by-Step: The Instant Scratch Fix
1) Clean the target area. Dust and grit make scratches look worse and can grind into the finish. Wipe with a barely damp microfibre cloth and dry thoroughly. A clean surface ensures the oil reaches the wood rather than clinging to dirt.
2) Warm the kernel. Hold a shelled walnut between your fingers for 10–15 seconds. Warmth softens the oils, speeding the blend. For tiny hairline marks, snap the nut to expose a fresh, oil-rich face.
3) Rub with intention. Work the walnut along the scratch in small circles, then with the grain. Use light-to-moderate pressure for 20–30 seconds. You’re aiming for a thin film, not a smear. Less is more.
4) Pause and assess. Leave the area for a minute so the oil settles into fibres. If the line still catches the eye, repeat the rub once. Most superficial scratches soften dramatically after the first pass.
5) Buff to finish. Take a clean cotton cloth and burnish briskly with the grain. This lifts any excess, evens the sheen, and blends the treated patch into surrounding boards. If the finish looks slightly dull, a pea-sized dab of floor-safe beeswax or conditioner over a larger area will unify gloss without making the spot look patched.
When to Use a Walnut—and When Not to
Not every mark is a candidate. The walnut trick excels at cosmetic correction but has limits. Use it confidently on shallow scuffs from moving chairs, light heel trails, or toy car tracks. Avoid it on open, raw wood patches, deep scratches that expose bare timber across grain, or floors with heavy whitewash where darkening a line becomes noticeable. Testing in an inconspicuous corner protects you from surprises.
If in doubt, match the remedy to the wound. Here’s a quick guide you can bookmark before reaching for the fruit bowl:
| Scratch type | Walnut effectiveness | Time to blend | Notes |
|---|---|---|---|
| Light surface scuff (finish intact) | High | 10–60 seconds | Ideal use case; buff well |
| Fine hairline scratch (topcoat disturbed) | Moderate–High | 30–90 seconds | May need two passes |
| Deep scratch or gouge (bare wood) | Low | 2–3 minutes | Use filler, stain, and topcoat |
| White/lightwash finishes | Variable | 30–90 seconds | Risk of dark halo; test first |
If a mark stays visible after two careful treatments and a buff, step up to a colour-matched wax stick or a water-based touch-up marker. Walnuts are for quick wins; persistent scars deserve purpose-made products.
Care, Maintenance, and Longer-Term Options
Think of the walnut hack as your emergency concealer, not your daily moisturiser. To keep floors looking even, establish gentle routines: lift, don’t drag; use felt pads; deploy mats inside entrances. Clean with a pH-neutral wood floor cleaner—never steam, which can cloud finishes and raise grain. Prevention remains the cheapest restoration.
For oiled floors, a quarterly recondition with a compatible maintenance oil keeps fibres saturated, reducing the contrast when scratches appear. Polyurethane floors prefer periodic screening and recoat, a professional light abrasion followed by a fresh top layer that resets sheen and seals micro-marks. If your boards carry deep, greyed scratches, consider a targeted repair: fill, stain-match, then spot topcoat, feathering edges to hide the transition. Reserve full sanding for severe wear or widespread damage; it’s dusty, costly, and finite—solid boards forgive a few cycles, engineered boards fewer.
One more vital note: households with nut allergies should skip walnuts entirely and reach for hypoallergenic alternatives. Appearance never outranks safety. With the right care hierarchy—quick blends, smart protection, periodic professional TLC—your floor will keep telling its story without shouting every scuff.
A walnut won’t rebuild wood, but it can take the sting out of a scratch faster than you can find the toolbox. It blends, softens, and buys time until a deeper fix fits the calendar and the budget. Keep a few kernels in a labelled jar with your cloths, and treat scuffs before they set the visual tone of a room. Small, swift acts of maintenance add up to years of quiet elegance underfoot. Which patches in your home could benefit from a 60-second blend before you plan a bigger restoration?
Did you like it?4.7/5 (23)