In a nutshell
- 🔥 Revive stale bread in about 2 minutes using a hot pan, a few drops of water, and brief lid time to restore a crisp crust and tender crumb.
- 🧪 Heat and moisture reverse starch retrogradation, re-gelatinising starches to soften the interior while direct contact re-crisps the crust.
- 🍳 Step-by-step: preheat pan, lightly moisten bread, cook with a lid for 30–45 seconds, flip, and finish uncovered for crackle—aim for a faint sizzle, not smoke.
- 🥖 Match method to bread: higher heat for sourdough/baguette, gentler for sandwich loaves; use cast iron or stainless, and balance hydration to avoid soggy or leathery results.
- 💡 Smart alternatives: oven for whole loaves, microwave + pan for very dry slices, and toaster with a light mist—plus flavour boosts like garlic, oil, or butter.
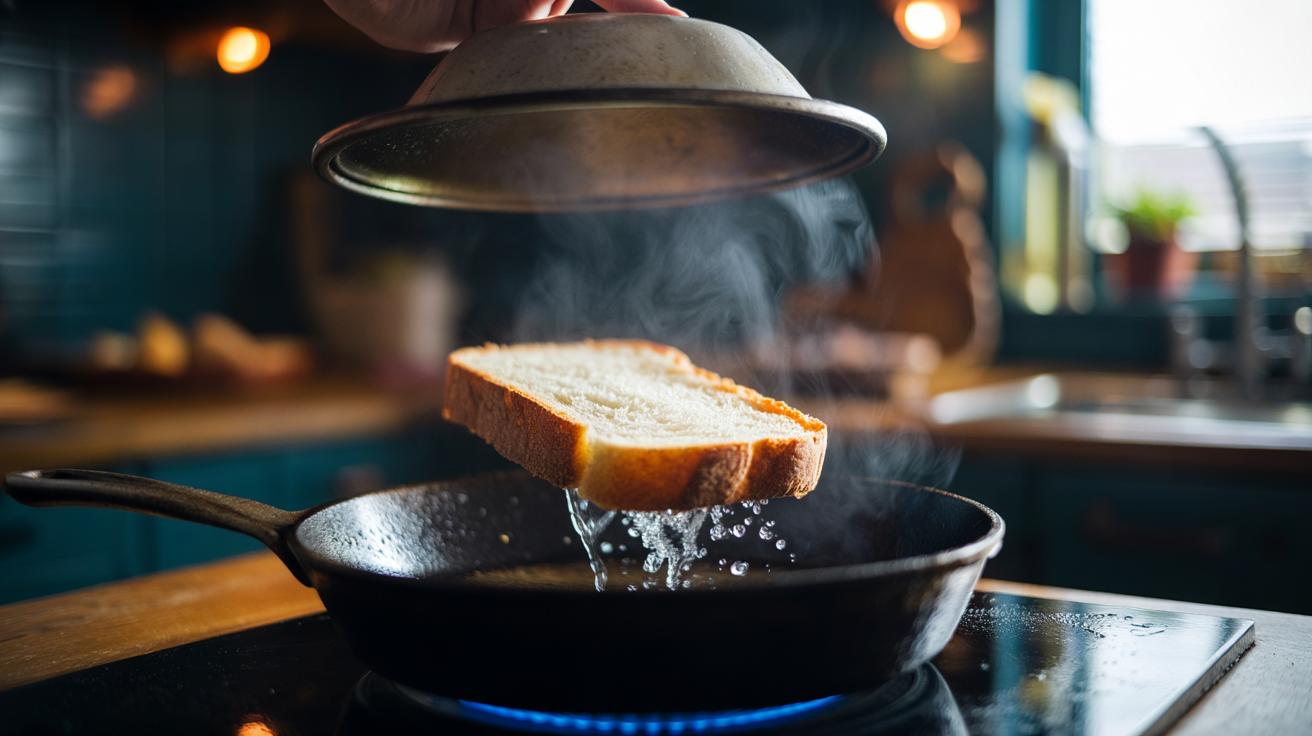
Got a loaf that was lively yesterday but dull today? Don’t bin it. With a hot pan and a splash of water, you can give stale bread a second life in minutes. The science is simple, the result sensational: a crisp crust, a tender crumb, aromas reborn. This trick takes about two minutes and can rescue everything from a baguette to sliced sandwich bread. It’s quick enough for breakfast, reliable enough for dinner service, and cheap enough to make you feel brilliantly thrifty. Here’s how to do it properly, and why it works so well.
Why Bread Goes Stale (and How Heat Reverses It)
Bread doesn’t go dry first. It goes hard. That hardness is caused by starch retrogradation: as the loaf cools after baking, starch molecules in the crumb reorganise and expel moisture, tightening structure and dulling flavour. Air exposure accelerates the process. Refrigeration makes it worse. Freezing pauses it. Luckily, there’s a way back. Apply heat and a little moisture, and those starches gelatinise again, softening the interior and reviving aroma compounds. A hot surface also wakes the crust, restoring that brittle, shattery edge we crave.
Enter the hot pan method. A skillet, a few drops of water, a lid. You create micro-steam inside the pan to rehydrate the crumb, while direct heat re-crisps the exterior. The key is balance: enough steam to soften, enough dry heat to crackle. It’s faster than an oven, kinder than a microwave, and more controllable than a toaster. For day-old bread, it’s almost miraculous. For two- or three-day bread, it still works—just add a touch more moisture and time. The result: the smell of a bakery and the texture of a fresh loaf, without switching on the oven.
The Two-Minute Pan Method, Step by Step
Start with a clean, wide pan—cast iron or heavy stainless works best. Heat it over medium-high until a droplet of water skitters. For a crusty loaf (baguette, sourdough), slice thick pieces—1.5–2 cm—to preserve interior moisture; for sandwich bread, use full slices. Flick a few drops of water onto the cut face of the bread or quickly pass the crust under a running tap. You are not soaking it; you’re adding a whisper of moisture. Too little and it stays tough; too much and you’ll get soggy.
Lay the bread in the hot pan. If you want a softer crumb, immediately cover with a lid to trap steam for 30–45 seconds. Lift the lid and flip. For crusty loaves, press gently with a spatula to make contact. Total time: about two minutes, sometimes less for thin slices, sometimes 3–4 minutes for denser heels. Listen. You want a faint sizzle, not smoke. When the underside is golden and the slice feels lighter and springy, it’s ready. Rest it on a rack for 30 seconds. The crust will firm as steam dissipates. Serve at once for peak texture and aroma.
Choosing the Right Pan, Heat, and Hydration
Different breads want slightly different handling. Sourdough and baguette respond beautifully to higher heat because of their robust crusts; the pan re-crisps without drying the interior. Sandwich loaves need gentler heat and more lid time, ensuring the crumb softens without scorching. When in doubt, start lower and increase. Cast iron retains heat superbly, delivering that crackle; stainless is snappy but less forgiving; non-stick is easy, but avoid excessive heat and metal tools. A few drops of water are often enough, but for very stale pieces, lightly mist both sides or rub with damp hands.
Watch for common pitfalls. Smoke means the pan is too hot; drop the heat and try again. If the slice is leathery, you didn’t add enough moisture or you skipped the lid. If it’s floppy, you trapped too much steam; remove the lid earlier or finish uncovered for 20–30 seconds. For rolls or whole chunks, dampen the exterior and pan-toast each face in turn, lidding briefly to steam the interior. Aim for contrast: crisp crust, supple crumb, revived aroma. That contrast is the signature of refreshed bread, and the hot pan provides it with minimal fuss.
Alternatives and When to Use Them
The hot pan is the weekday hero, but other methods have their place. An oven gives even heat for whole loaves; ideal if you’re feeding a crowd. A microwave is fast yet risky; use it to pre-soften for seconds, then finish in a pan to recover the crust. A toaster rescues sliced bread quickly, though it dries easily; pair with a water mist for better results. If time and energy cost matter, the stovetop is efficient and ready in moments. Choose the method that matches the bread, the quantity, and your schedule.
| Method | Time | Crust Result | Crumb Moisture | Best For | Caution |
|---|---|---|---|---|---|
| Hot Pan + Lid | 1–3 min | Crisp to shattery | Soft, springy | Slices, rolls | Don’t over-steam |
| Oven (180–200°C) | 5–10 min | Even, robust | Good, especially whole loaves | Whole loaves | Preheat needed |
| Microwave + Pan | 30 sec + 1 min | Restored in pan | Very soft | Very dry slices | Can turn rubbery |
| Toaster | 1–2 min | Crisp | Drying risk | Thin slices | Mist lightly first |
For flavour lifts, rub hot crust with a cut clove of garlic, brush with olive oil, or finish with butter and salt. Herbs sing. Cheese melts. Day-old now tastes deliberate. The core principle remains: add a whisper of water, apply heat, balance steam with dry contact. Once you master that, any loaf can return to form.
In a cost-of-living squeeze, wasting bread feels wrong and unnecessary. This two-minute technique keeps good loaves in circulation, stretches budgets, and turns “meh” into marvellous with almost no energy or equipment. The aroma is nostalgic, the crunch persuasive, the crumb newly tender. It’s a tiny intervention with outsized, delicious rewards. Ready to rescue today’s leftovers and serve them as if they just came from the oven—perhaps with soup tonight, eggs tomorrow, bruschetta at the weekend? What bread will you revive first, and how will you dress it to make the most of its fresh-again character?
Did you like it?4.5/5 (27)